 Well, first order of business today was to work on the Valentine's postcards - I know they aren't due until Valentine's Day, but as most of them have to go to the US, I thought it was better to finish early. Also, my mother is visiting from the 14th (speaking of V. Day) and I know I won't get as much work done while she's here [the upside of that, besides the fact that I like my mother and enjoy her visits, is that she is going to help me paint Alex's room and/or the hallway - hoorah!] so I thought I should try to get ahead with lots of stuff - that being one thing to tick off the list...
Anyway. For these, I used commercial fabrics, as I mentioned yesterday - four different ones across the top with a different one across the bottom. Mostly red, with some metallics and texture to them. I knew they'd be largely covered up, so I wanted stuff to give interest and movement, rather than any particular pattern.
The next step was to use fusible webbing and foil to make the small hearts (cut a heart shape out of webbing, fuse to fabric, then apply transfoil & iron). After the first one, I learned that it works better when the shapes don't go over a seamline, so I made the hearts a little smaller on the later ones. I did four silver hearts and one purple one on each card, but not all in the same position. I'm not quite that much of a control freak...
 After the foil hearts were on, I used a zigzag stitch to couch down some red yarn around the hearts - not strictly in heart shapes, but basically outlining the hearts. Then I cut some larger heart shapes out of fused angelina fibres and stitched around them to hold them down (hopefully, they won't tear in the post - we'll see). Instead of the usual sort of satin stitch around the edge of the card, I decided to try something a little different - Valentines are traditionally often edged in lace, so I have stitched pink lace (and here I bet you thought I wasn't a pink lace kind of girl! It's amazing what stuff I have tucked away in my sewing room...) around the edges. Two of them have a different lace, as I ran out of the thin light pink one (which, frankly, is a good thing, because I'm really not a pink lace kind of girl).
As if that wasn't enough fibre work for one day, I decided to start something a little different. If this new project turns out well, it's going to be a wall hanging for my friend Sophie, who is turning 40 this year. She saw something a little bit similar (only much better artistry, LOL) in one of my issues of Cloth, Paper, Scissors and really like them, so I thought I'd try for a similar effect. As I said, we'll see how it turns out. The basic idea is to use lots and lots of different fibres to build a landscape - maybe with some beads thrown in, too.


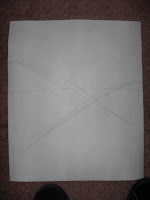
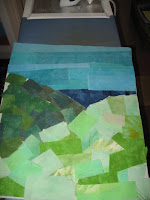
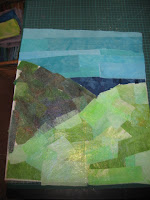
Here's how I'm tackling it. First, I cut a piece of very stiff interfacing about 12-13 inches wide and about 16-18 inches high - a little bigger than I want the finished piece to be. I drew some rough lines on it (left photo above) - my idea was two hills with a glimpse of sea, and the sky. Then I used scraps of hand-dyed fabrics to collage the scene - a dark hill in the background and a lighter hill in the foreground (rightphoto above) - I used fusible webbing (I think I should buy stock in the company at this rate!) to stick everything down - I did this the easy way - by just covering the whole thing with fusible and more or less just randomly sticking the fabrics down. Because I know it will be heavily covered later, it doesn't matter too much what it looks like, I just want some texture and shape. Did the same thing with the sea and sky (left photo below) though I decided to do the sky in strips.


Then I fused some angelina into sheets (not too thick) and covered both the hills with that. I just wanted a little glimmer behind all the fibres (right photo above). I decided (for the time being anyway) not to use angelina in the sky - I think it wants a slightly different texture there. And then I started adding yarns - couched down with zig zag mostly, occasionally with a straight stitch, depending on what I think the yarn wanted (below photos). I may later add some decorative stitches as well - we'll see. There's a lot more to do, but so far, I am really pleased with how it looks. And I'm thinking I might do the sea in beads rather than fibres, but again, we'll see what it wants when I get there.


1 comment:
I love your scenery. Thanks for the tutorial on how you did it. Something else to try!
Post a Comment